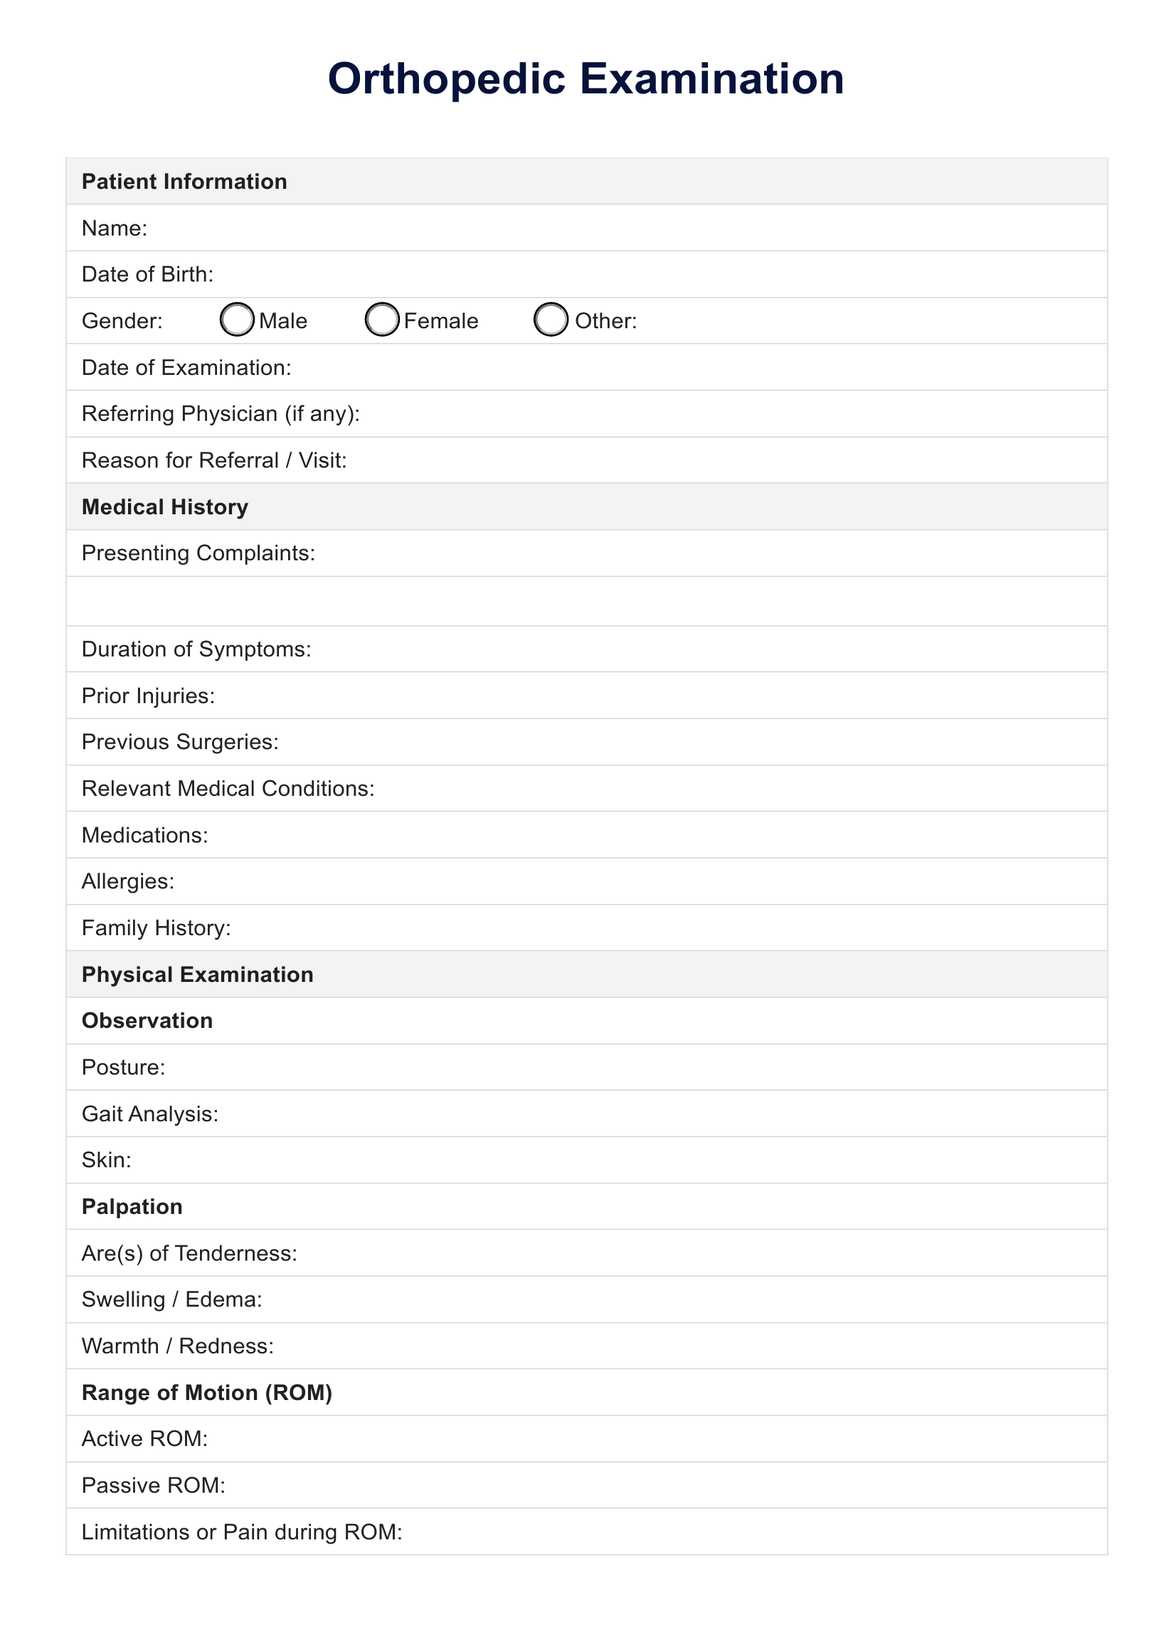
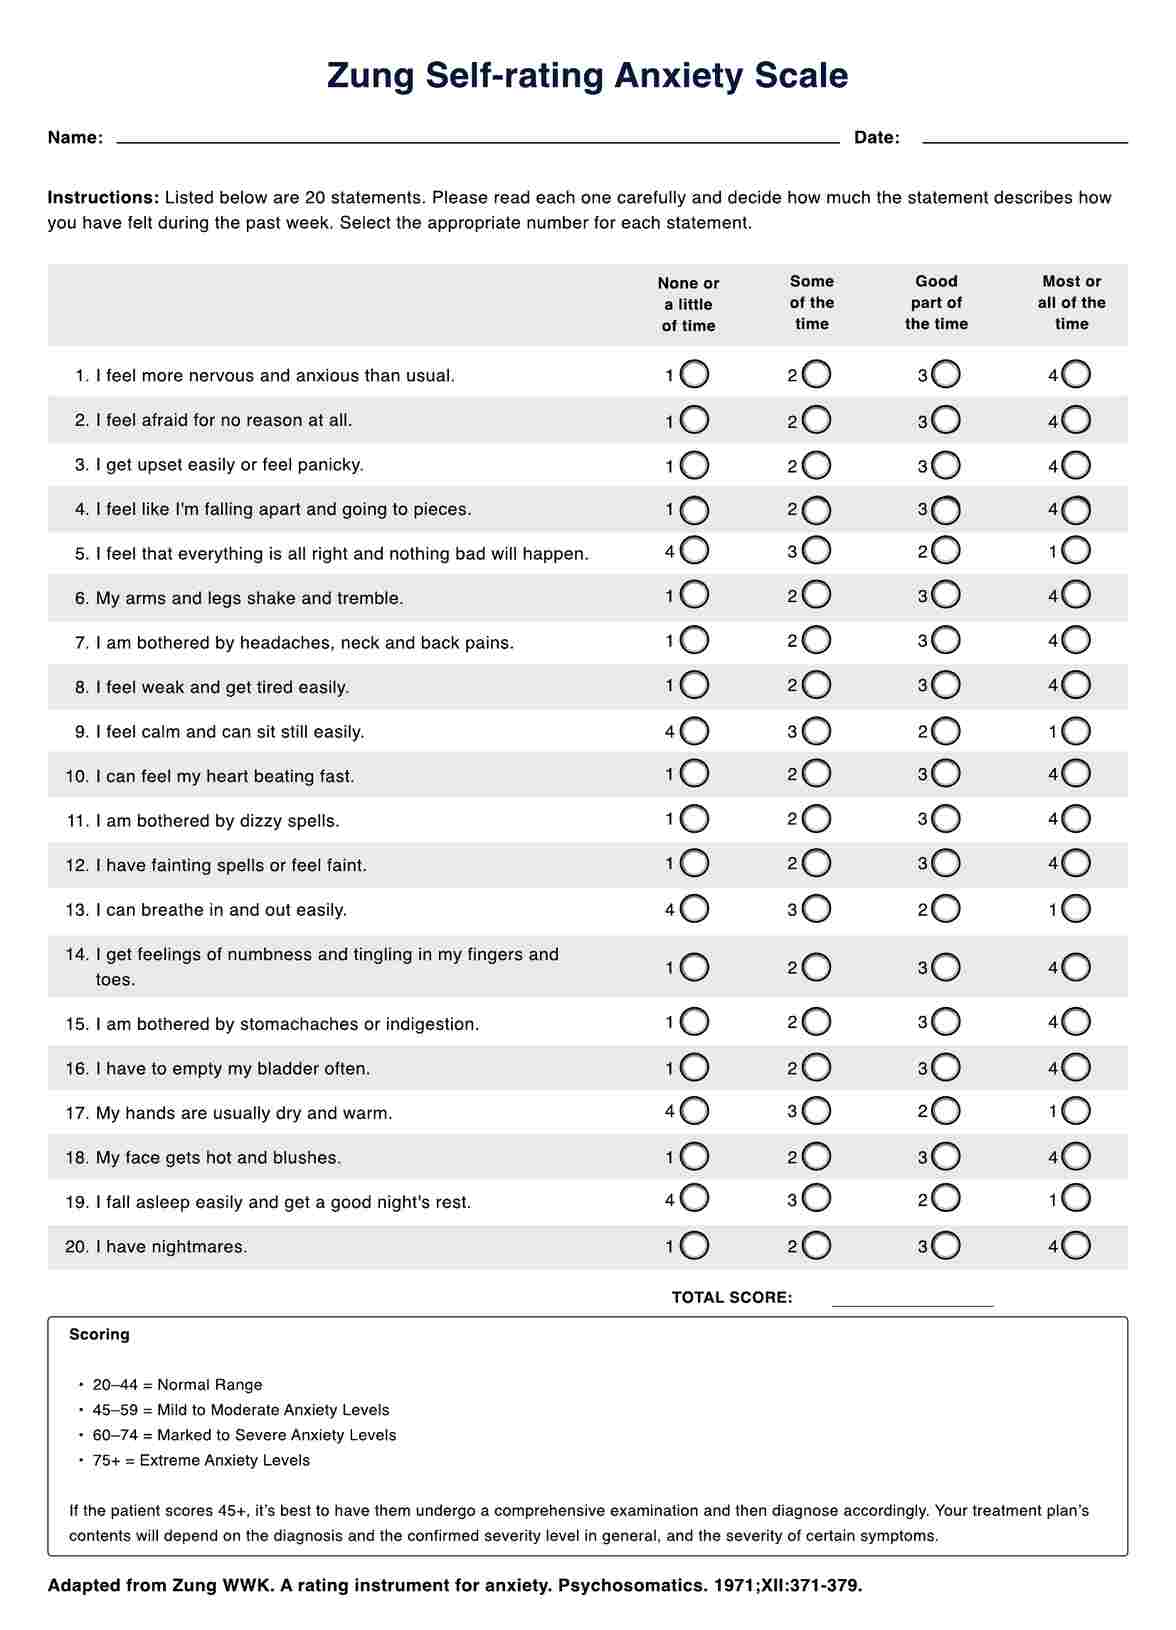
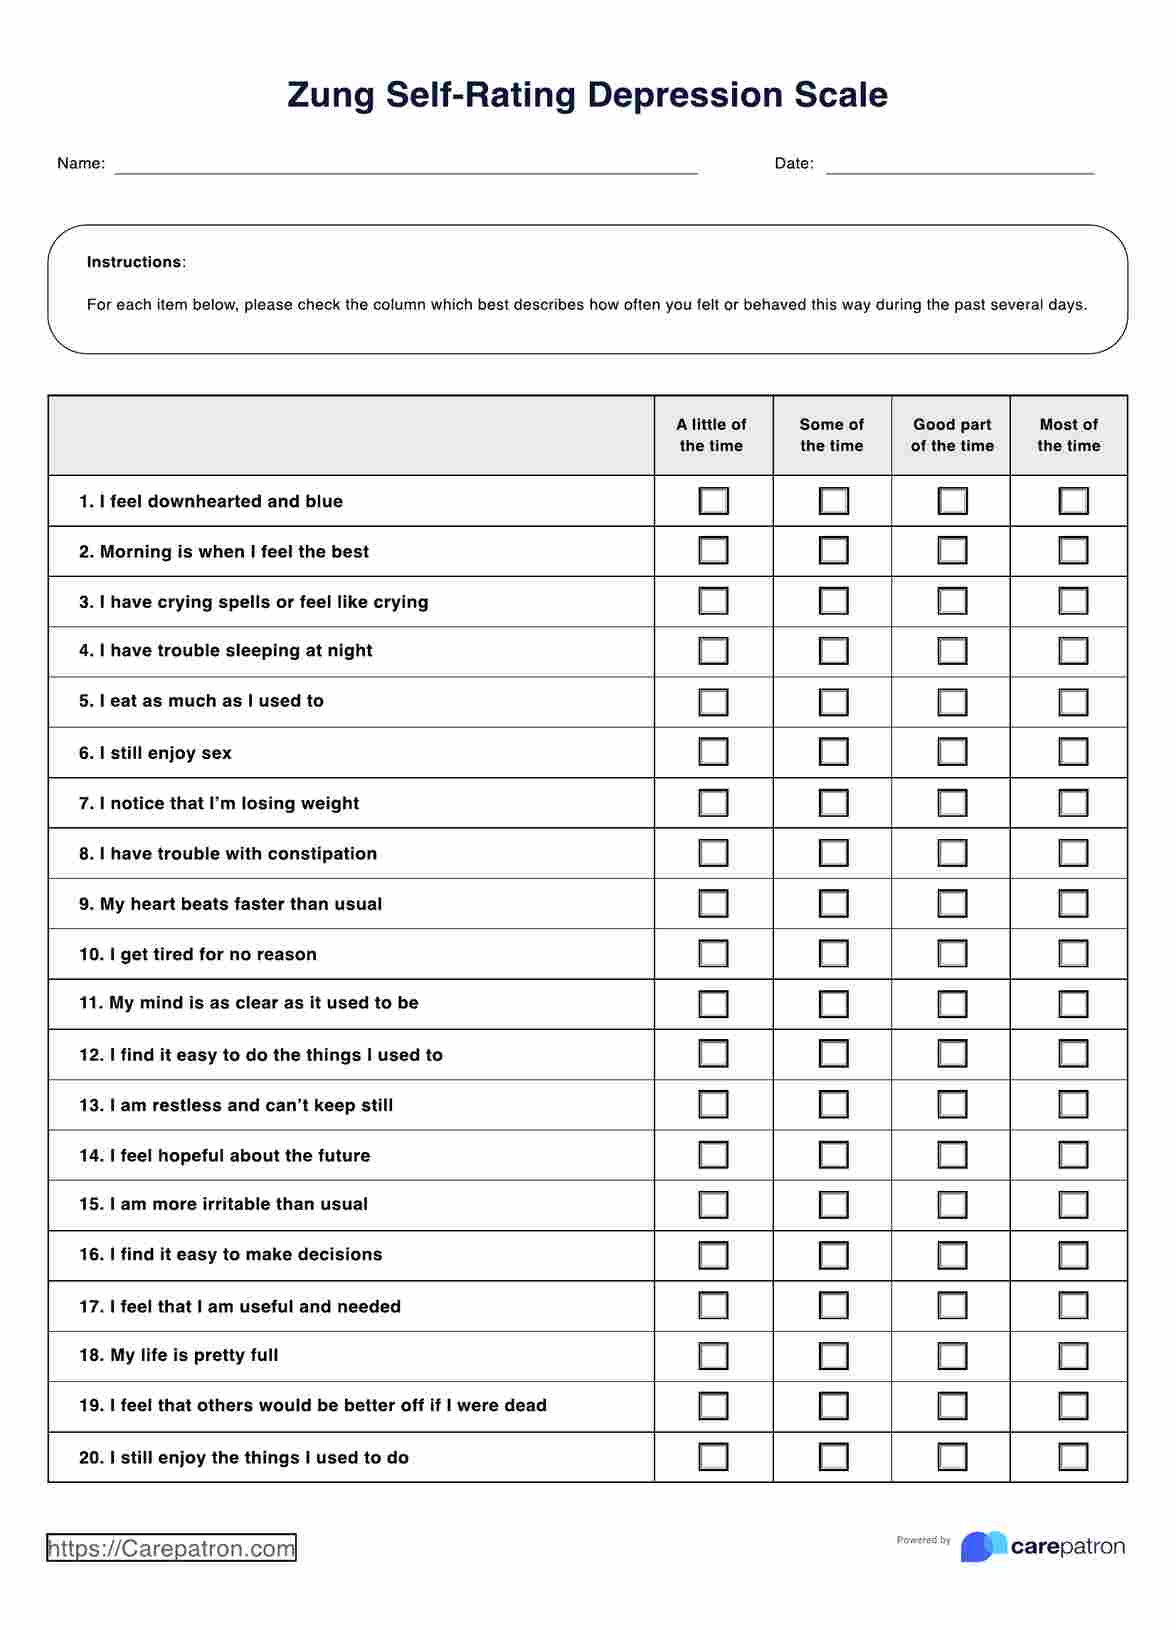
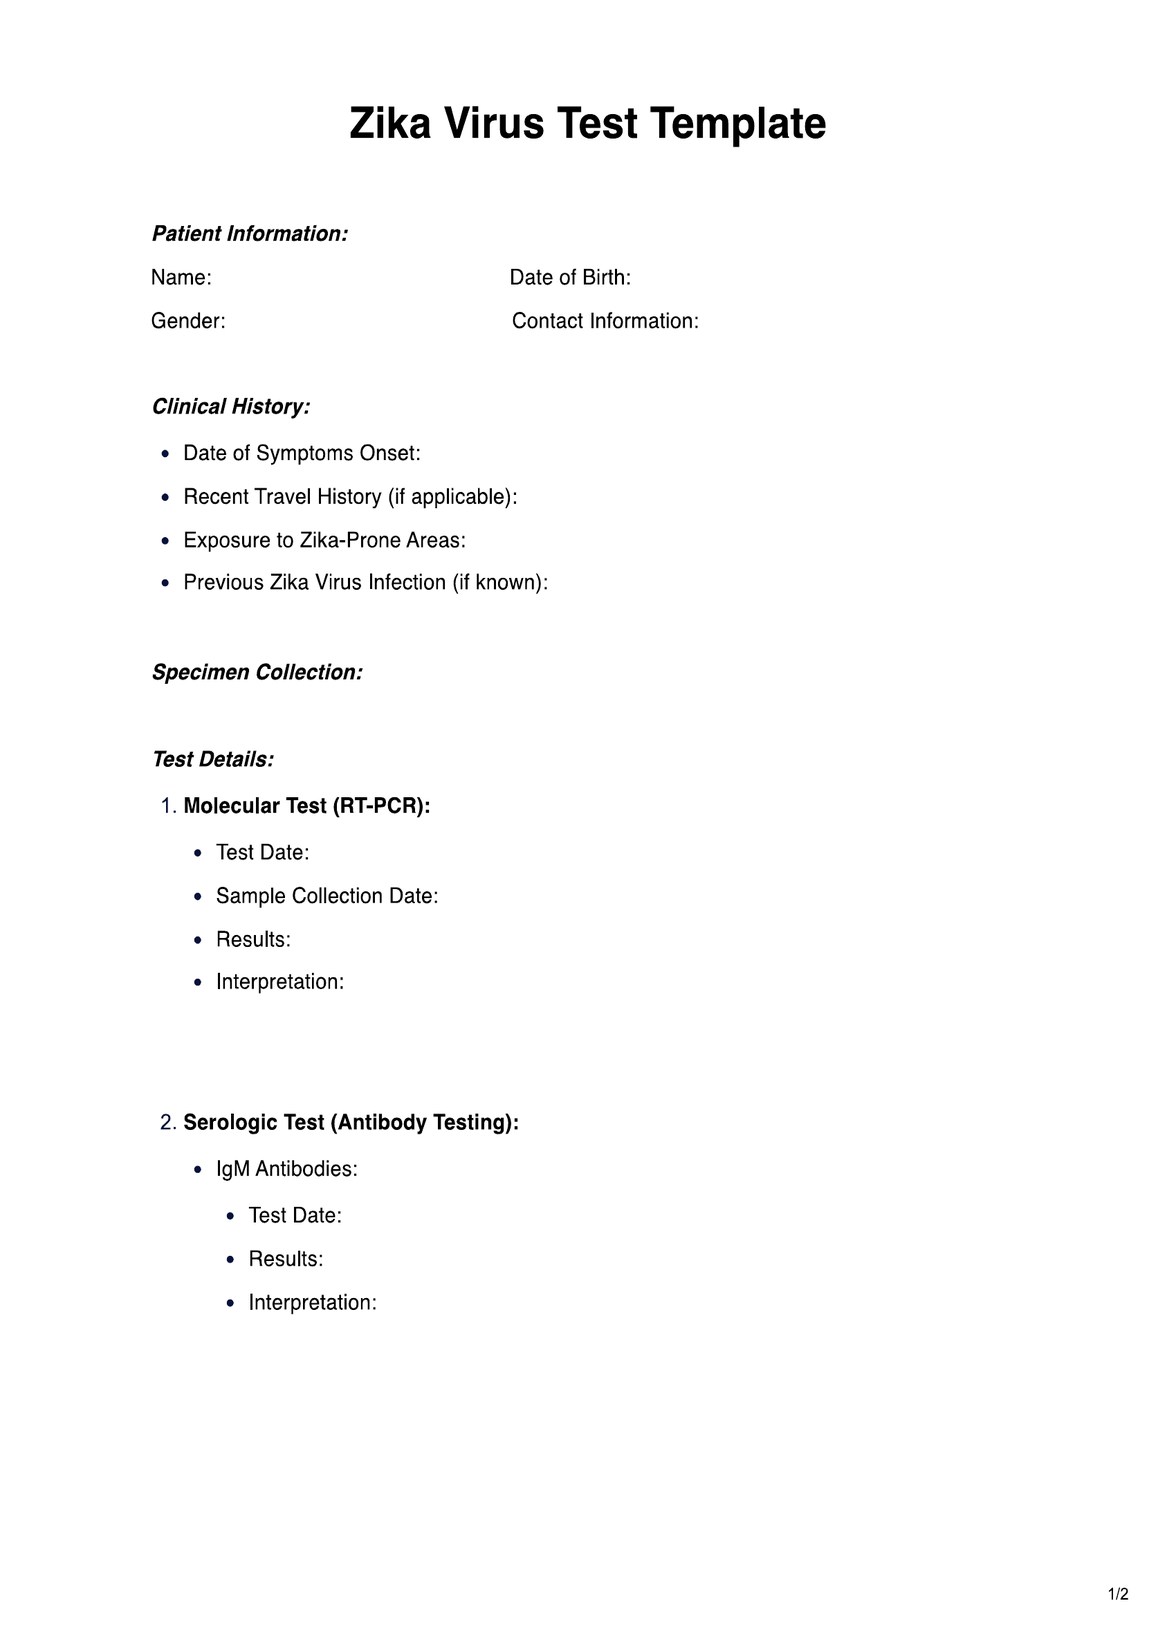
How to conduct an Orthopedic Examination
Conducting an orthopedic physical examination is a systematic process that involves a series of steps to assess the musculoskeletal system effectively. This examination is critical for identifying abnormalities, diagnosing conditions, and formulating a treatment plan. Here’s a detailed breakdown of the steps involved:
Step 1: Patient history
The first step in a physical examination is gathering comprehensive patient information. This includes understanding the patient's symptoms, medical history, prior injuries or surgeries, and how these factors affect their daily lives. This step is crucial as it guides the healthcare professional in focusing on the physical examination and selecting appropriate tests.
Step 2: Inspection
Inspection is the initial part of the physical examination, where the healthcare professional visually examines the patient for any visible signs of abnormality. This includes looking for swelling, redness, deformities, and asymmetry in the body's movement or structure. Observing the patient's posture, gait, and overall physical condition provides valuable clues about their musculoskeletal health.
Step 3: Palpation
Following inspection, palpation involves using the hands to feel the musculoskeletal structures. This technique helps identify tenderness, warmth, swelling, or any irregularities in the bones, joints, and surrounding tissues. Palpation can pinpoint specific areas that may require further evaluation through special tests.
Step 4: Range of motion (ROM) tests
Movement is a key aspect of the orthopedic physical examination. ROM tests assess the extent of movement at a particular joint, including active (patient moves the joint) and passive (examiner moves the joint) movements. These tests help determine the joint's functionality, flexibility, and presence of pain during movement.
Step 5: Muscle strength testing
This step evaluates the strength of various muscle groups. The examiner asks the patient to apply force against resistance, measuring the muscles' strength and comparing it to the expected normal strength. Muscle strength testing is vital for assessing the impact of musculoskeletal conditions on patient mobility and function.
Step 6: Special tests
Special tests are targeted examinations used to diagnose specific conditions. Each body part has its set of special tests designed to detect particular issues. For example, the Lachman test for ACL integrity in the knee or the Finkelstein test for De Quervain's tenosynovitis in the wrist. These tests are critical for confirming the diagnosis and are selected based on the patient's history and the findings from the previous examination steps.
Step 7: Neurological examination
Although not exclusive to orthopedics, a brief neurological examination may be performed to assess nerve function, especially if the patient presents with pain, numbness, or weakness. This can include tests for reflexes, sensation, and motor function, providing information about the neurological contributions to the musculoskeletal condition.