How does this printable Yergason's Test work?
The printable Yergason's Test is a free resource that provides a standardized test for detecting biceps pathology. Here are the steps involved in doing the test:
Step 1: Download the test
The printable Yergason's Test can be downloaded from the link we provided. If you want a physical copy, you can print it.
Step 2: Gather patient information
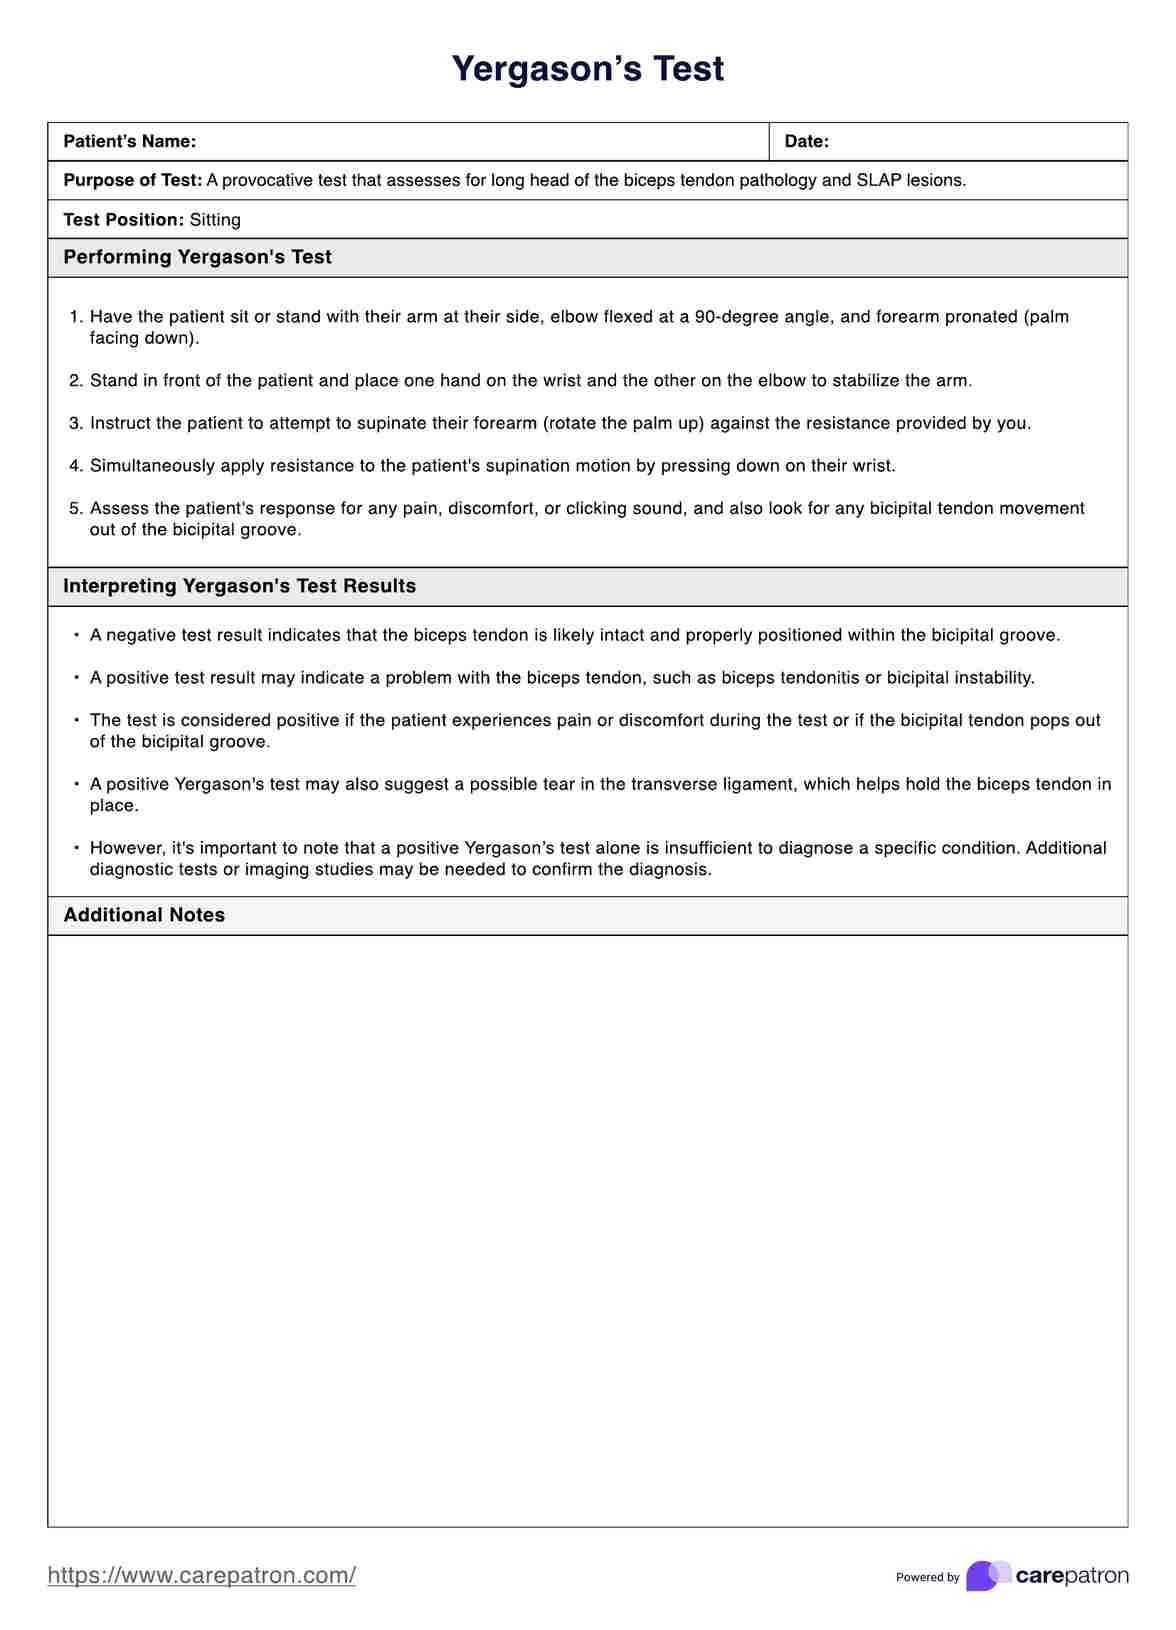
Gather patient information and history. Key questions should focus on the onset, duration, and nature of shoulder pain, any history of trauma or overuse, and associated symptoms like clicking or popping. Physical examination may reveal tenderness over the bicipital groove, swelling, and limited range of motion, suggesting the need for the Yergason Test.
Step 3: Perform the test
Ask the patient to sit or stand with their arm at their side, elbow flexed at a 90-degree angle, and forearm pronated (palm facing down). Stand in front of the patient and place one hand on the wrist and the other on the elbow to stabilize the arm. Instruct the patient to attempt to supinate their forearm (rotate the palm up) against the resistance you provide while simultaneously applying resistance by pressing down on their wrist.
Step 4: Assess for pain or discomfort
Observe the patient's response for any signs of pain, discomfort, or clicking sounds during the maneuver. Additionally, feel for any movement of the bicipital tendon out of the bicipital groove, which may indicate a positive test.
Step 5: Record results
Note the patient's response and document the test results in their medical record. Ensure all observations, including pain levels, sounds, and tendon movement, are accurately recorded for future reference and diagnosis. A negative test result indicates that the biceps tendon is likely intact and adequately positioned within the bicipital groove. In contrast, a positive test result may indicate a problem with the biceps tendon, such as biceps tendonitis or bicipital instability.