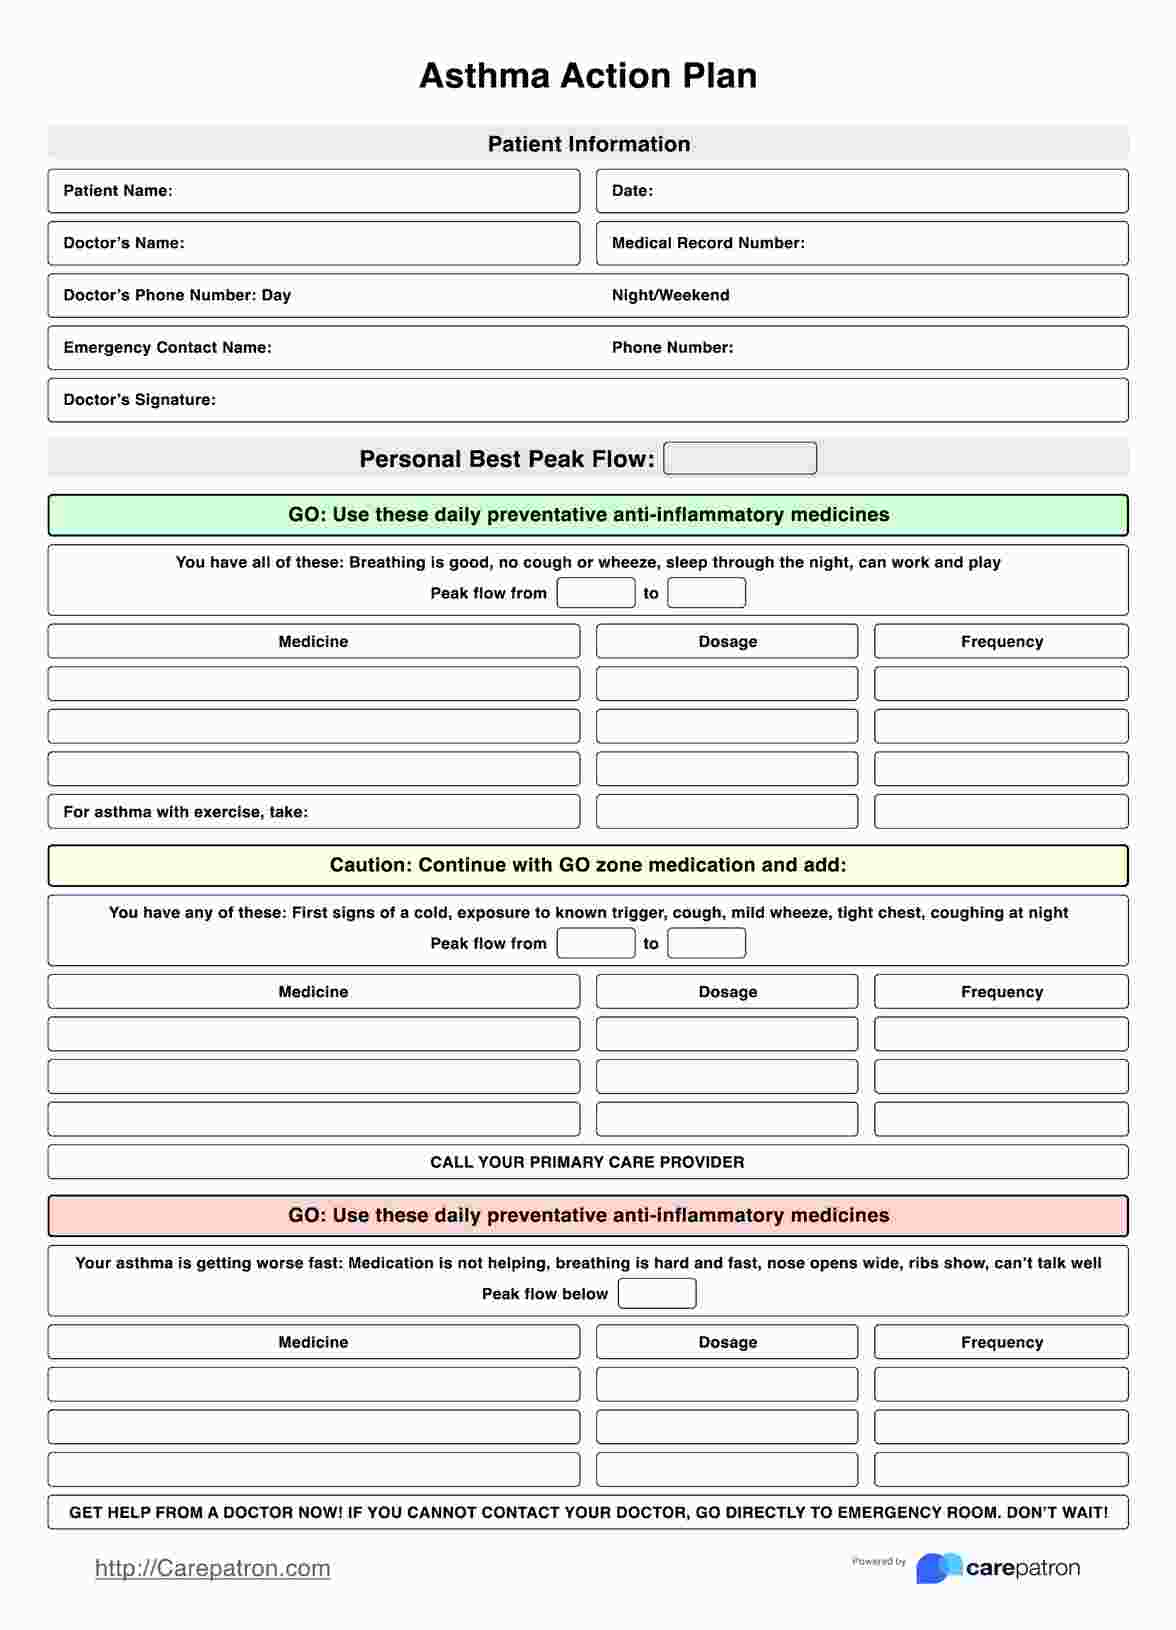
How to use this Asthma Action Plan:
Write down basic information regarding your patient and yourself.
Let’s say that a parent and her child visit you to have the child checked for their asthma (they are already diagnosed). They visit you to get an asthma action plan to get a headstart before something triggers it or they enter the season when their asthma is usually active. The first thing that you have to fill up on this template is basic information regarding you and your patient:
- Your patient’s full name
- The date of their consultation with you
- Your full name
- The asthma action plan document’s medical record number
- Your contact number during the day
- Your contact number at night/during the weekend
- The patient’s emergency contact and contact number
- Your signature
While these are just basic things you’d find on almost any medical document, these are necessary in case of emergencies. Asthmatics should always have their Asthma Action Plans ready wherever they may be.
Let’s say the child is at school, or an adult with asthma is at the office. Their teachers/peers can contact both the doctor and the emergency contact in case the child/adult’s asthma triggers and it’s severe.
Tell the patient about the severity levels.
One of the most noticeable parts of this free Asthma Action Plan is its severity indicator. It’s color-coded based on a traffic light!
Green means “GO!” This means that, despite the asthma being active, they are still well. The patient still has good breathing, is not coughing or wheezing, can sleep well, and can work and play without problems! Those in the Green Zone still need to take preventative medicine to make sure to stop asthma in its tracks before it gets any worse.
Yellow signals “CAUTION!” Patients who fall on this severity level have been exposed to their triggers, they develop the first signs of having a cold or they already have a cold, they cough (even at night), they have mild wheezes, and their chest tightens every now and then when they cough. Patients need to take their preventative medicines alongside other prescribed medications to help curb asthma’s effects.
Red is bad because it signifies “DANGER!” If your patient falls on this severity level, well, that’s not good! This means that preventative medicines and additional medicines are not working, the patient is having a hard time breathing (they breathe hard and fast), their nose opens wide, they can’t talk well, they wheeze more than normal, and they feel like something is strangling them while they cough. Patients in the Red Zone need to see a doctor. IMMEDIATELY.
Now that your patient knows about the severity levels, how do you determine which zone they’re at?
Peak Flow Test time!
In order to determine the severity level of their asthma, you must first write down their best Peak Flow result. You’re going to have to administer the test to them to get a baseline!
Here’s what you need to do:
- Grab a Peak Flow Meter and set the number to 0
- Hand the meter to your patient
- Have your patient stand up and inhale deeply
- While they’re holding their breath, have them place the meter between their teeth while their lips are sealed
- Have them blow out as hard and fast as they possibly can
- Write down the number result they got
- Have them do this two more times
- Then write the best result on the Personal Best Peak Flow field
Tell your patient (and their guardian/companion if they tagged along) to purchase a Peak Flow Meter for them to use at home, school, or the office so they can determine their asthma severity when the asthma triggers.
Fill out the zones!
The Asthma Action Plan template has preset sections for all three zones. Which zone the patient falls will depend on the following:
- Green Zone: if their Peak Flow hits 80% or more of their Personal Best Peak Flow
- Yellow Zone: if their Peak Flow hits between 50% - 79% of their Personal Best
- Red Zone: if their Peak Flow falls below 50% of their Personal Best
Each zone has a segment that says: “Peak Flow: from ________ (Personal Best) to _________ (their current Peak Flow).” Make sure to (have them) fill in the blanks.
You must also write down the medication they need to take for each zone, stating the specific medicine and their dosage as well as when/how often they have to take them.
For the Green Zone, you must list the preventative medicine they should use, especially when they exercise or do anything physically demanding.
For the Yellow Zone, they have to follow the medication listed for the Green Zone, but you have to list down additional medication they need to take. There’s also a default “Call your primary care provider” written on it.
As for the Red Zone, list what they need to take under “Take the following medicines and call your doctor NOW.”
And that pretty much covers the plan! Just remind them to follow the medication and the prompts depending on the zones and make copies they can take to school or work.