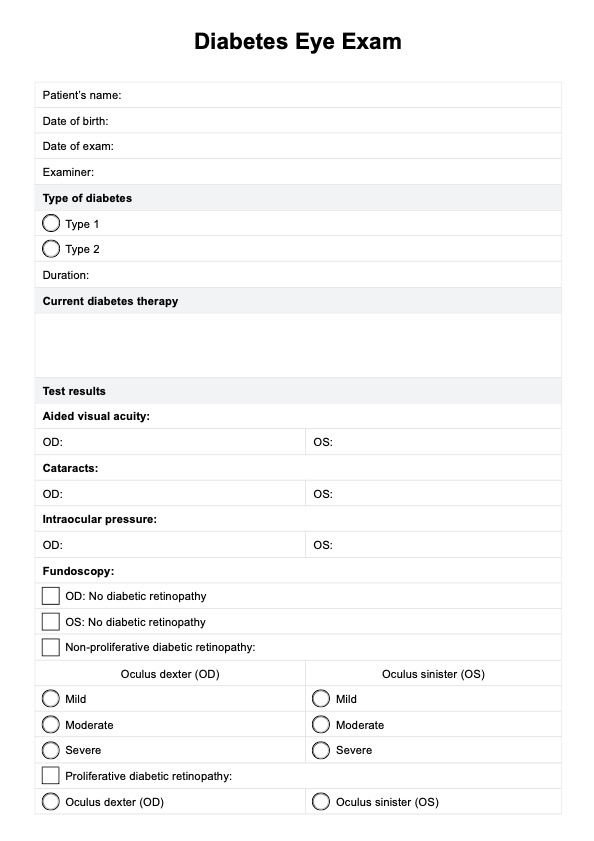
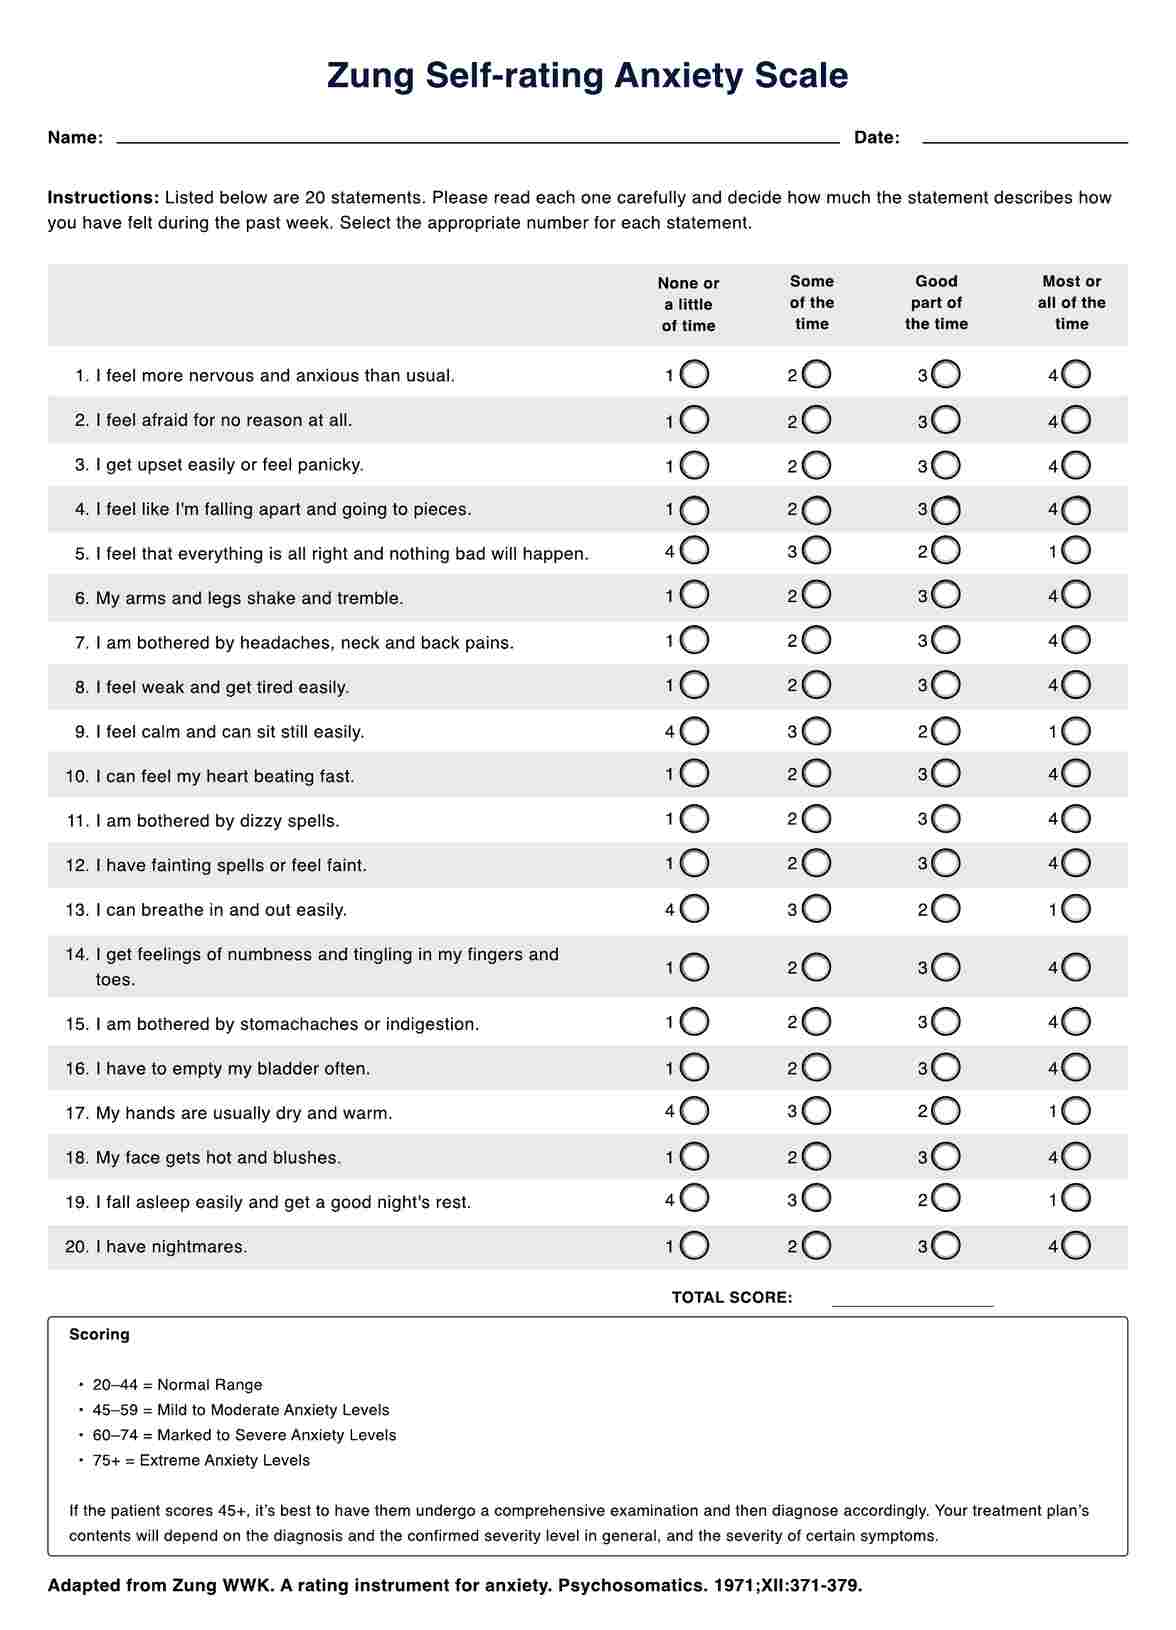
How to perform a Diabetes Eye Exam?
Performing a diabetes eye exam is crucial for detecting and managing eye conditions related to diabetes. The following steps outline how medical professionals should conduct a comprehensive diabetic eye exam to ensure optimal ocular health for people with diabetes.
Step 1: Access and download Carepatron's Diabetes Eye Exam template
To streamline the process, medical professionals can access and download Carepatron's Diabetes Eye Exam template. You can find this in the platform's resource library. Use it to record your test findings.
Step 2: Review patient's medical history
Before the eye exam begins, the eye doctor should review the patient's medical history. This includes understanding their diabetes management, blood sugar levels, and any existing eye conditions. Knowing the patient's history helps in identifying potential risks and tailoring the eye exam accordingly.
Step 3: Conduct a visual acuity test
The visual acuity test assesses the sharpness of the patient's vision. This step helps identify any changes in vision, such as blurred vision, which can be an early sign of diabetic retinopathy or other eye conditions.
Step 4: Examine the front of the eye
Using a slit lamp, the eye doctor examines the front of the eye, including the cornea, iris, and lens. This examination helps detect cataracts and other issues that may affect vision.
Step 5: Dilate the pupils
Dilating the pupils allows the eye doctor to get a better view of the retina and the optic nerve. This step is crucial for identifying damage to the blood vessels in the retina, new blood vessels growth, and signs of macular edema.
Step 6: Perform retinal imaging
Retinal exams, such as optical coherence tomography (OCT) or fundus photography, provides detailed images of the retina. These images help in detecting diabetic retinopathy, macular edema, and other retinal issues that might not be visible during a regular eye exam.
Step 7: Assess intraocular pressure
Measuring the intraocular pressure helps in detecting glaucoma, a condition that can damage the optic nerve. People with diabetes are at a higher risk of developing glaucoma, making this assessment a vital part of the diabetic eye exam.
Step 8: Fundoscopy
Next, a fundoscopy is performed to examine the back of the eye, including the retina, blood vessels, and optic nerve. This allows for early detection of any diabetic retinopathy or other diabetic-related changes in the eye.
Step 9: Record findings
After your Diabetes Eye Exam, record your clinical findings in the template. In this step, it is important to accurately document and record all findings from the Diabetes Eye Exam. This includes any abnormalities or concerns that were noted during the examination.
Step 10: Discuss with patient
It is also important to discuss these findings with the patient. This allows for better understanding of their eye health and any potential risks or complications that may arise due to diabetes. It also provides an opportunity for patients to ask questions or express any concerns they may have.